How to Fix Delaminated Plywood Layers Effectively?

Time:2026-05-28 Author:Aria
0%

Delaminated plywood layers can pose a significant challenge in woodworking and construction. Understanding how to repair delaminated plywood layers is essential for maintaining integrity in various projects. While it may seem daunting, this process can be manageable with the right approach.

Effective repair begins with assessing the damage. Identifying the extent of delamination helps determine the best methods for restoration. Gluing layers back together can often be a straightforward solution, but it requires careful execution. Some may find it frustrating when DIY attempts fail; thus, patience and precision are key.

Utilizing appropriate tools and materials is crucial. A strong adhesive specifically designed for plywood is recommended. Proper clamping helps ensure a tight bond, but it can be tricky to achieve. Many find that the repair may not be perfect on the first try, leading to valuable learning experiences. Overall, mastering how to repair delaminated plywood layers not only enhances skills but also fosters a deeper appreciation for craftsmanship.
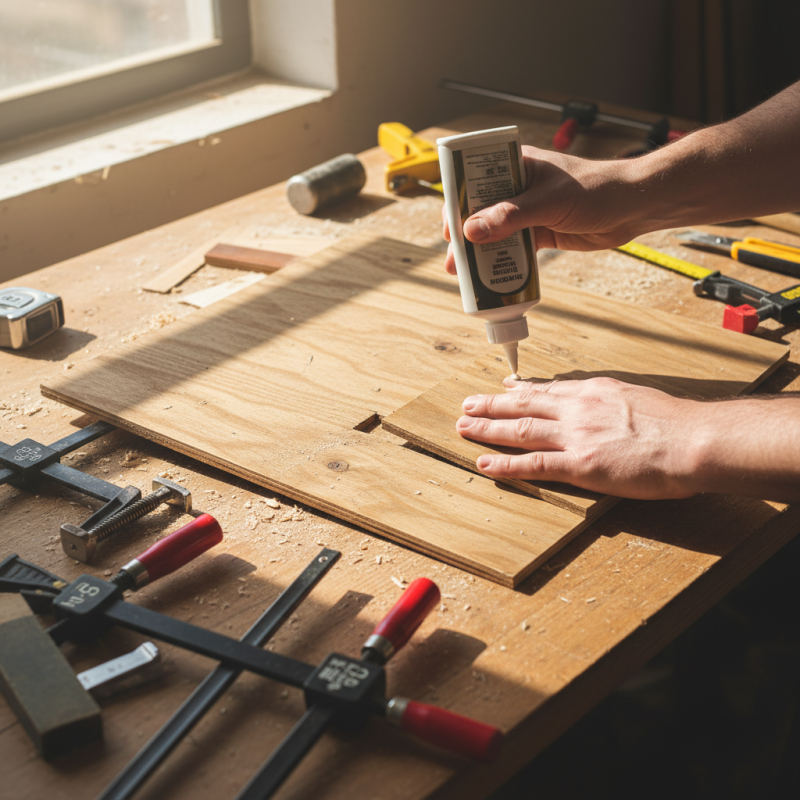
How to Fix Delaminated Plywood Layers Effectively?

Understanding Delamination: Causes and Effects on Plywood

Delamination in plywood occurs when layers separate. This problem can lead to structural weakness and reduce the material's overall lifespan. Understanding the causes of delamination can help prevent it. Moisture exposure is a primary culprit. When plywood absorbs water, the adhesive bonds weaken, causing layers to peel apart. Temperature fluctuations can also play a role. Rapid changes can stress the adhesive, resulting in failure.

Another significant contributor is poor manufacturing processes. Inadequate pressure during pressing can lead to weak bonds. Similarly, insufficient adhesive application creates potential weak points. The effects of delamination extend beyond aesthetics. A delaminated panel can compromise the integrity of a construction project. It is crucial to identify these issues early on.

To effectively address delamination, inspection is essential. Check for bubbles or visible separations. If detected, it’s important to reassess your material choice for future projects. Sometimes, it may be necessary to replace the affected plywood entirely. Remediation practices, like applying clamps and using wood glue, can provide temporary fixes. However, evaluating the underlying causes is vital for long-term solutions. Understanding these factors ensures that future projects maintain their strength and durability.

Identifying Delaminated Areas: Tools and Techniques

Identifying delaminated areas in plywood requires careful observation. Start by looking for visible gaps between the layers. A flashlight can help reveal hidden separations. Tap the surface lightly to listen for hollow sounds. This often indicates a problem beneath the surface. Using a moisture meter can help assess areas with potential water damage. Pay attention to any sections that feel spongy, as this can suggest early signs of delamination.

Tools like chisels and scrapers allow you to test the condition of the plywood. Scrape away top layers gently to expose inner issues. Be cautious not to cause further damage while doing this. Sometimes, delamination isn’t visible on the surface but can be felt. Trust your instincts if something feels off. Make detailed notes on areas of concern. This helps create a clear plan for repairs.

Often, specific sections may need more attention than others. Recognizing when an area is beyond repair is crucial too. It’s a learning process, and reflection can lead to better techniques in the future.

Step-by-Step Guide to Repairing Delaminated Plywood

Delaminated plywood can be a frustrating problem. Repairing it requires careful attention to detail. Begin by assessing the extent of the damage. According to industry reports, up to 30% of plywood failures occur due to delamination, often caused by moisture exposure. This highlights the importance of a thorough repair process.

Start by removing any loose or damaged layers. Carefully use a putty knife to pry these sections away. Clean the surface to ensure a good bond. Apply an appropriate adhesive. Waterproof wood glue is often recommended for this task. Studies indicate that the right adhesive can restore up to 80% of the plywood’s original strength.

Once the adhesive is applied, press the layers together firmly. Use clamps to hold the plywood in place, allowing it to cure properly. This can take anywhere from a few hours to a day. Finally, sand the surface for a smooth finish. It's essential to assess the area again, ensuring that no bumps or imperfections remain. Repairing delaminated plywood requires patience and precision. The effort can extend the plywood's lifespan significantly, making it worth the time invested.

How to Fix Delaminated Plywood Layers Effectively?

Step Description Materials Needed Estimated Time
1 Identify the delaminated area N/A 15 minutes
2 Clean the surface of the plywood Brush or cloth 10 minutes
3 Apply wood glue into the delaminated area Wood glue 5 minutes
4 Clamp the layers together Clamps 1 hour
5 Remove clamps and clean excess glue Putty knife 15 minutes
6 Sand the repaired area for a smooth finish Sanding paper 20 minutes

Choosing the Right Adhesive for Plywood Repair

When repairing delaminated plywood, choosing the right adhesive is crucial. Not all adhesives work equally well with plywood. It's important to consider the type of adhesive that can provide a strong bond without compromising the wood layers. Polyurethane glue is popular due to its water resistance and strong bonding capabilities. It expands as it cures, filling gaps effectively. However, it requires careful application to avoid excess squeeze-out.

Another option is water-based adhesives. They are easy to clean up and can penetrate the layers well. But their bond strength might not match that of polyurethane. Consider the working time as well; some adhesives cure quickly, while others allow for adjustments. Understanding these factors can help ensure a successful repair.

Testing adhesives on scrap pieces of plywood is a good practice. It allows you to see how each adhesive reacts with the wood. Keep in mind that imperfections can occur. Maybe the bond does not hold up as expected. Reflecting on these failures can teach valuable lessons for future repairs.

Preventive Measures to Avoid Future Delamination Issues

Preventive measures can greatly reduce the risk of plywood delamination. Proper storage and handling are crucial. Store plywood in a dry, well-ventilated area to prevent moisture absorption. Keep it off the ground, ideally on pallets, to avoid water contact. Ensure that the room temperature is stable to prevent extreme fluctuations.

Another important factor is the use of quality adhesives. Not all adhesives are made equal. Select ones that are specifically designed for plywood applications. Ensuring that the adhesive is compatible with the materials involved will help prevent future issues. Apply adhesive evenly and follow recommended drying times closely to achieve maximum bond strength.

Regular inspections are also a valuable practice. Look for early signs of delamination, such as bubbling or separation along the seams. Addressing minor issues promptly can prevent larger problems down the line. Keep in mind that environmental conditions, like humidity, can also affect plywood integrity. Adjust your maintenance practices accordingly to ensure long-lasting performance.

Plywood Delamination Causes and Prevention Measures

FAQS

: What is delamination in plywood?

: Delamination is when layers in plywood separate, weakening the material's structure.

What causes delamination?

Moisture exposure and temperature fluctuations are key causes of delamination in plywood.

How can moisture affect plywood?

When plywood absorbs water, the adhesive bonds weaken, leading to layer separation.

How to identify delaminated areas?

Look for gaps, tap lightly for hollow sounds, and use a flashlight for hidden issues.

What tools can help test plywood condition?

Chisels and scrapers can expose inner issues but use them carefully to avoid damage.

What signs indicate potential delamination?

Spongy areas and visible separations often suggest early delamination signs.

Should I replace delaminated plywood?

If delamination is severe, replacement might be necessary for safety and effectiveness.

How can I temporarily fix delamination?

Clamps and wood glue can provide temporary solutions but evaluate root causes for durability.

Is it important to inspect plywood regularly?

Yes, regular inspections help identify issues early and maintain the strength of projects.

What is the takeaway from dealing with delamination?

Reflecting on techniques can improve repair methods and enhance future project quality.

Conclusion

In the article "How to Fix Delaminated Plywood Layers Effectively?", we explore the common problem of plywood delamination—its causes and effects, which often stem from moisture exposure, poor adhesive application, or inadequate surface preparation. Understanding these factors is crucial for identifying the delaminated areas effectively using various tools and techniques.

The article provides a comprehensive step-by-step guide on how to repair delaminated plywood layers, emphasizing the importance of selecting the right adhesive for a durable fix. Finally, it suggests preventive measures to maintain the integrity of plywood and avoid future delamination issues, ensuring the longevity of your projects. This insightful guide serves as a valuable resource for anyone looking to address plywood delamination efficiently.

Aria

Aria

Aria is a dedicated marketing professional with a deep passion for innovative strategies and a keen understanding of our company's product offerings. With a wealth of experience in the industry, Aria excels at crafting engaging content that highlights the unique features and benefits of our......