 Regit Decor
How to Cut Plywood Without Splintering the Edges?
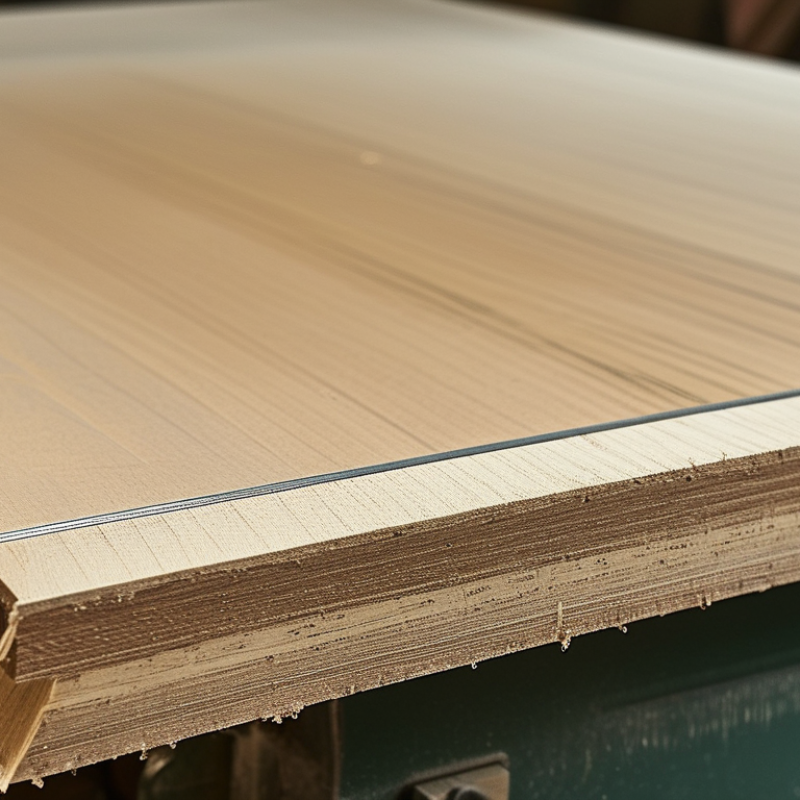
How to cut plywood without splintering the edges is a practical question for every careful woodworker. Plywood looks smooth, yet its thin veneer can tear suddenly. One careless pass may leave a ragged edge, lifted fibers, and extra sanding. The problem becomes worse when cutting across the grain or using a dull blade.
Tom Silva, a master carpenter known for practical woodworking instruction, often stresses this principle: “Let the blade do the work; forcing it only tears the fibers.” That advice captures the central idea behind clean plywood cuts. Use a sharp, fine-tooth blade designed for plywood. Support the sheet firmly. Mark the cut clearly. Move steadily, without pushing too hard.
A zero-clearance insert can reduce vibration around the blade. Painter’s tape over the cut line may also help hold fragile veneer fibers in place. Score the line lightly with a utility knife when the edge must look especially clean. For circular saw cuts, place the finished face downward. For table saw cuts, place it upward. These details matter.
Still, no method works perfectly every time. Plywood quality varies, and even experienced woodworkers occasionally produce a small chip. I have found that rushing causes more damage than the tool itself. Check the blade height, test the setup on scrap, and accept that one “perfect” technique may need adjustment. Clean edges come from preparation, control, and a willingness to rethink the process.
Choosing the Right Blade and Cutting Tools for Plywood
How to Cut Plywood Without Splintering the Edges?
Choosing the Right Blade and Cutting Tools for Plywood
A clean plywood cut begins with the blade, not the saw. For a circular saw, choose a sharp, fine-tooth blade designed for wood panels. More teeth usually produce smoother edges, while fewer teeth remove material faster but may tear the veneer. A carbide-tipped blade with about 40 to 60 teeth suits many cabinet-grade sheets. Check the blade’s cutting direction before mounting it. An incorrectly installed blade can damage the surface and create dangerous kickback.
Tool choice also depends on the cut. A track guide or straightedge helps a circular saw stay steady across a full sheet. Support the plywood on both sides of the cut, especially near the final few inches. For curves, use a jigsaw with a fine-tooth, downward-cutting blade when the visible face points upward. A table saw can provide accurate repeated cuts, but the fence must remain parallel to the blade. Even a small alignment error can pinch the panel.
I usually mark the cut line on painter’s tape and score it lightly with a sharp knife. This reduces veneer lifting, though it does not prevent every chip. I once trusted a new blade too quickly and skipped a test cut; the first edge still splintered. Test on an offcut from the same sheet. Feed the tool slowly, but not so slowly that the blade rubs and overheats. Plywood varies between manufacturers, so one setting may not suit every panel.
How to Cut Plywood Without Splintering the Edges? - Choosing the Right Blade and Cutting Tools for Plywood
| Cutting Situation | Recommended Blade or Tool | Tooth or Bit Guidance | Best Cutting Direction or Setting | Edge-Splintering Risk | Recommended Prevention Method |
|---|---|---|---|---|---|
| Straight cuts with a circular saw | Fine-finish carbide-tipped plywood blade | High tooth count; approximately 40–60 teeth for a typical 7¼-inch blade | Set the blade only slightly deeper than the plywood thickness; feed steadily | Medium to high | Place the finished face downward because the blade usually exits on the upper face; use a guide rail or straightedge |
| Long, accurate panel cuts | Track saw or circular saw with a guide rail | Fine-tooth blade designed for sheet goods | Use a controlled, continuous feed; avoid stopping while the blade is engaged | Low to medium | Support the full panel and clamp the guide securely to reduce vibration and movement |
| Small curved or interior cuts | Jigsaw with a clean-cut plywood blade | Fine teeth; a down-cut blade can reduce splintering on the top face | Use a moderate speed and allow the blade to cut without forcing turns | Medium | Apply painter’s tape along the cut line and use a zero-clearance or closely fitting shoe when practical |
| Very clean visible edges | Scoring pass followed by a full-depth cut | Use a shallow first pass with the same fine-finish blade | Score approximately 1–2 mm deep, then complete the cut in a second pass | Low | The shallow groove severs surface veneer fibers before the full-depth cut can pull them away |
| Crosscuts with a table saw | Fine-tooth crosscut blade or combination blade suitable for plywood | Use a higher tooth count than for aggressive ripping | Keep the fence or crosscut sled aligned; do not push the panel sideways into the blade | Medium | Use a zero-clearance insert and a properly supported crosscut sled for narrow or short pieces |
| Ripping along the grain | Combination or plywood blade with sufficient gullets for chip removal | Moderate tooth count; extremely fine blades may cut more slowly and accumulate heat | Use a parallel guide and maintain a smooth, even feed rate | Medium | Support both sides of the cut and replace or sharpen the blade if it burns, wanders, or tears fibers |
| Cutting with a router | Sharp straight bit or compression-style bit for guided trimming | Use a bit diameter appropriate for the template and keep the bit sharp | Make shallow passes rather than removing the full thickness at once | Low to medium | Use a template, backer board, and climb-cut only when appropriate and under controlled conditions |
| Any plywood cut where both faces matter | Fine-tooth blade with masking tape or a sacrificial backer | Choose the finest practical blade that matches the tool and material thickness | Use firm, continuous support directly beneath the cut line | Low | Tape both sides of the cut line when suitable, or sandwich the plywood between sacrificial panels |
FAQS
Use a sharp, fine-tooth blade designed for plywood. More teeth usually create smoother edges. A dull blade still causes splintering.
Set the blade 3–5 millimeters below the plywood. Excessive depth increases tooth movement. That can worsen veneer damage.
Place the sheet on a flat sacrificial surface. Support it near the cut line. Weak support often causes chipped edges.
For a circular saw, place the finished face downward. For a table saw, keep it upward. The blade should enter the good surface gently.
Yes, masking tape can support a fragile veneer around the cut line. Mark the line clearly first. Remove the tape carefully afterward.
Slow down and keep the saw base firmly against the panel or guide. Do not push harder. Force can create a wandering edge.
Trim loose splinters with a sharp utility knife, following the grain. Use a firm sanding block. Begin with 120-grit paper, then use 180-grit and 220-grit.
Remove dust with a dry cloth. Apply a thin coat of suitable wood sealer with a small brush. Let it dry, sand lightly, and add another thin coat.
Make a test cut on leftover plywood first. Inspect it under bright light. My test cuts are not always perfect, so I adjust the setup before cutting the final panel.
Conclusion
Learning how to cut plywood without splintering the edges starts with choosing the right blade and cutting tool. Use a sharp, fine-tooth blade designed for plywood, and mark the cut line accurately with a pencil or measuring guide. Support the sheet firmly on both sides of the cut to reduce vibration and prevent the material from bending or tearing. Applying masking tape along the cut line can help hold the surface fibers together, while lightly scoring the line with a utility knife creates a cleaner starting point.
Before cutting, adjust the saw for a controlled feed rate and set the blade depth only slightly below the plywood. Keep the saw steady and allow the blade to do the work rather than forcing it through the sheet. Afterward, inspect the edge and remove minor splinters with fine sandpaper or a sharp trimming tool. Sealing the finished edge can improve its appearance, durability, and resistance to moisture.
