Delaminated plywood can look minor at first: a raised veneer, a hollow tap, or a narrow opening along the edge. However, hidden moisture may already be weakening several layers. This 2026 guide explains How to repair delaminated plywood layers through practical inspection, careful preparation, and controlled bonding. It is written for homeowners, builders, and maintenance professionals who need a dependable repair rather than a quick cosmetic fix. Small details matter. A damp sheet, clogged glue line, or uneven clamp can determine whether the repair survives.
The process begins with identifying the damage and locating its full boundary. Use a sharp knife, moisture meter, straightedge, and light tapping when appropriate. Remove loose fibers without cutting sound veneer unnecessarily. Dry the affected area fully, then select an adhesive compatible with the plywood, exposure level, and manufacturer’s instructions. Apply even pressure with protected cauls, and allow sufficient curing time. Do not rush this stage. Temperature and humidity can change the result significantly.
Not every panel deserves repair. Deep rot, repeated swelling, crushed plies, or structural movement may require replacement. That judgment is sometimes difficult. Even experienced workers can underestimate hidden damage. Repair is not always beautiful. It should be stable, dry, and properly sealed. We will compare suitable tools, adhesive choices, clamping methods, finishing steps, and common mistakes. The guidance also encourages checking product data sheets and relevant building standards, because plywood grades and repair conditions differ. A careful record of moisture readings and curing conditions can make future decisions more reliable.
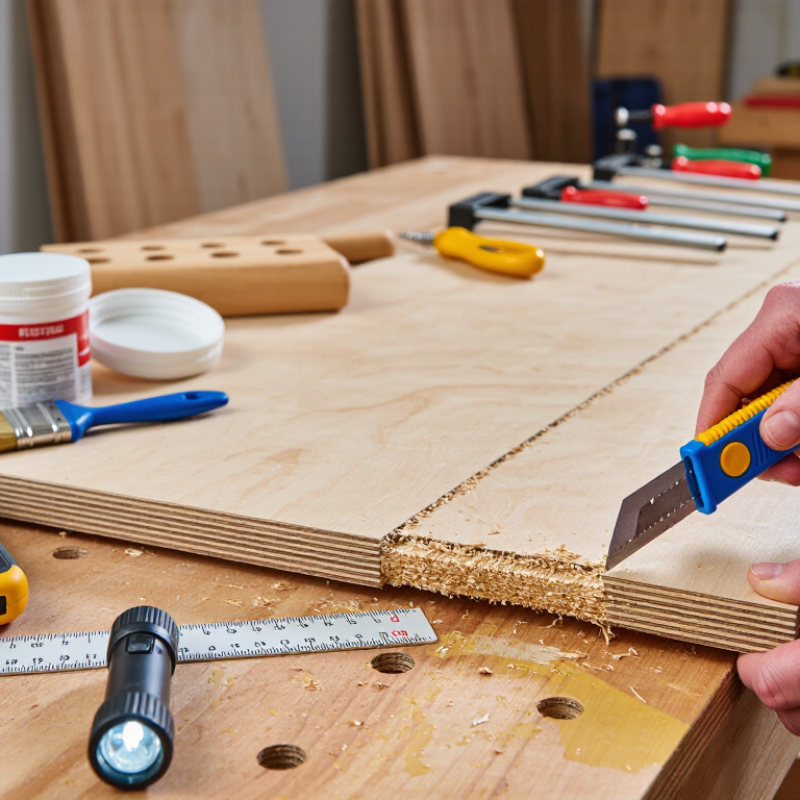
Plywood delamination begins when adhesive bonds between veneers lose strength. Water entry is a common trigger, especially at exposed edges, screw holes, and unsealed cuts. Poor pressing, contaminated veneer surfaces, and insufficient adhesive coverage can also create weak bond lines. The USDA Forest Products Laboratory reports that wood decay fungi generally need moisture content above 20%, making prolonged dampness a serious warning sign. Measure several locations, not just the visibly damaged area.
Look for raised veneers, bubbling, soft spots, and open seams. A sharp tap may sound hollow over separated layers. It helps, but it can mislead. Confirm suspicious areas with a moisture meter and a small inspection cut. Record readings near the damage and in dry-looking plywood. APA panel guidance stresses that bond performance depends on manufacturing quality, panel grade, and exposure conditions. Therefore, the panel’s marking and service environment matter.
The damaged zone may be local or widespread. Press the surface gently with a blunt probe. If only one small pocket moves, local repair might be practical. If movement follows several veneer lines, replacement is usually safer. Check edges under strong light; dark staining, swollen fibers, and repeated cracking suggest long-term moisture exposure. The Wood Handbook notes that wetting and drying cycles cause wood to swell and shrink, which can stress bonded layers. I would not trust appearance alone. Hidden separation often extends beyond the softest spot.
Before repairing delaminated plywood, identify the moisture source. Check roof leaks, plumbing, ground contact, and poor ventilation. A moisture meter helps locate hidden dampness. The USDA Forest Products Laboratory’s Wood Handbook reports that wood commonly reaches about 6–10% moisture content indoors at 30–50% relative humidity. Let the panel approach a stable reading before bonding.
Cut away loose or crushed veneers with a sharp chisel. Stop at clean, firmly attached wood. Brush out dust, then dry the exposed layers with moving air. Do not force wet plywood flat. APA’s Engineered Wood Construction Guide stresses protecting panels from prolonged wetting and allowing them to dry before enclosure. Gather a compatible structural adhesive, disposable spreader, wax paper, flat cauls, clamps, gloves, and a moisture meter. Follow the adhesive’s technical data for open time and pressure. Guessing here can waste the panel.
Tips: Use several small clamps, not one powerful clamp. Spread pressure across the repair with flat cauls. Test the adhesive on scrap plywood first. I once used too much pressure and squeezed out nearly all the bonding material. The repair looked neat but failed early. Leave the panel undisturbed for the full cure period, then seal exposed edges against renewed moisture.
Delamination usually begins when moisture weakens the adhesive between plywood veneers. Start by finding the leak, condensation source, or exposed edge. Repairing the panel before stopping moisture often causes the layers to separate again.
Work slowly. Use a thin putty knife to open the lifted veneer without tearing sound wood. Never force a tightly bonded section. Remove loose fibers, dirt, and softened adhesive with a scraper and stiff brush. A vacuum helps collect fine debris. If dark staining or a musty smell appears, pause and assess the area carefully. Contaminated wood may need professional evaluation.
Clean surfaces must dry completely. Place the panel on spacers so air can reach both sides. Use gentle airflow and keep the plywood flat to reduce warping. Avoid direct high heat; it can shrink the outer veneer while the inner layers remain damp. A moisture meter gives better guidance than touch alone. The reading should stabilize before bonding begins.
I have found that rushed drying creates hidden failures. One repair looked firm after a day, yet the center still felt cool and damp. After another drying period, the weak section became obvious. Small bubbles, soft edges, or a hollow tapping sound are warning signs. If several layers are crushed, swollen, or widely separated, replacing the panel is often safer than forcing a cosmetic repair.
2026 Top Guide: How to Repair Delaminated Plywood Layers?
Apply adhesive and clamp the layers back into position while the plywood is clean and dry. Lift the loose veneer gently; forcing it can split sound fibers. Remove dust and brittle residue with a small brush, then spread a thin, even layer of suitable wood adhesive across the separated surface. A narrow plastic spreader helps reach the center. Avoid flooding the gap: excess adhesive can make the veneer slide.
Align the layers, cover them with waxed paper, and place flat cauls on both sides to distribute pressure. Tighten clamps gradually, working from the center outward. The USDA Forest Products Laboratory’s Wood Handbook (FPL-GTR-282, 2021) reports that wood’s fiber saturation point is typically near 30% moisture content; below that point, moisture changes can cause dimensional movement. So, do not clamp damp plywood and expect a stable repair. Check that the surface stays level, and follow the adhesive’s stated clamping and cure times. Keep it still. After curing, remove squeeze-out and inspect the edge for remaining gaps. If the panel carries a load or delamination extends widely, a patch may not restore its original strength; replacing the panel may be safer. I once underestimated a tiny blister. It spread.
| 2026 Top Guide: How to Repair Delaminated Plywood Layers — Apply Adhesive and Clamp the Layers Back Into Position | ||||
|---|---|---|---|---|
| Stage | What to Do | Materials or Tools | Practical Guidance | Check Before Moving On |
| 1. Assess the damage | Inspect the lifted veneer and determine how far the separation extends. Check for rot, mold, swelling, or damage to multiple plies. | Bright light; thin flexible scraper or putty knife | Small, dry separations may be repairable. Replace the panel or consult a qualified professional if the plywood is structurally weakened, extensively swollen, rotten, or used in a critical load-bearing application. | The affected area is identified, and the panel is suitable for a local repair. |
| 2. Dry and clean | Correct the source of moisture. Allow the plywood to dry, then remove loose debris without enlarging the separation. | Dry cloth; scraper; moisture meter if available | Do not trap water under the veneer. Follow the adhesive maker’s requirements for wood condition and moisture content. | The surfaces are clean and dry enough for the selected adhesive. |
| 3. Choose an adhesive | Select an adhesive suitable for the plywood’s location and expected exposure. | Wood adhesive or suitable two-part epoxy; disposable spreader or syringe | Check the product label for compatibility, working time, cure time, and water-resistance rating. For exterior or damp conditions, choose a product specifically rated for that exposure. | The adhesive is appropriate for the intended use and can reach the full separated area. |
| 4. Apply adhesive | Carefully open the gap only as much as needed, then distribute adhesive over the accessible mating surfaces. | Small brush, spreader, or blunt-tip syringe | Apply a continuous, even layer. Avoid forcing the veneer or using excessive adhesive; follow the product’s instructions for application and assembly time. | Adhesive covers the separated surfaces without leaving large dry spots. |
| 5. Reposition and protect | Press the lifted layer back into its original position and wipe away squeeze-out as directed by the adhesive instructions. | Clean cloth; wax paper or plastic film; flat cauls | Place a non-stick separator between the repair and cauls. Use flat cauls to spread clamping force and help prevent dents or surface marks. | The veneer lies flat and aligns with the surrounding surface. |
| 6. Clamp the repair | Clamp the repair evenly, keeping the layer flush while the adhesive sets. | Clamps; flat cauls | Use enough clamps to maintain even contact. Tighten only until the layers are seated; excessive pressure can squeeze out too much adhesive or damage the plywood. Follow the adhesive maker’s clamping-time instructions. | The repair remains flat, aligned, and securely held without visible crushing. |
| 7. Allow full cure | Leave the clamps in place for the specified period, then allow the adhesive to reach its full cure before sanding or loading the panel. | Product instructions; timer | Cure time varies with adhesive type, temperature, humidity, and joint conditions. Do not rely on a generic time estimate; use the product label. | The adhesive has reached the stated cure time under the actual conditions. |
| 8. Finish and prevent recurrence | Remove residue, lightly sand only if needed, and seal or refinish the surface where appropriate. Address leaks or repeated wetting. | Scraper; fine abrasive; suitable finish | A surface repair does not restore severely damaged structural plywood. Keep the panel protected from moisture and inspect nearby edges and fasteners. | The repair is bonded, the surface is protected, and the moisture source has been addressed. |
After repairing delaminated plywood layers, allow the panel to dry fully before finishing. The USDA Forest Products Laboratory Wood Handbook, FPL-GTR-190, explains that wood continues to shrink and swell as moisture changes below fiber saturation. A hidden damp core can reopen the bond. Measure moisture at several points, not only near the visible damage. The panel should feel firm, flat, and dry. Lightly sand raised fibers, remove dust, and apply a compatible sealer to exposed faces and edges. Edge sealing matters most because end grain absorbs moisture quickly. Avoid heavy coatings that trap moisture inside.
Tips: Use a moisture meter. Check corners twice. Do not rush curing.
Apply finish in thin, even coats. Follow the coating manufacturer’s drying interval, then inspect under angled light. Look for bubbles, edge lifting, hairline cracks, soft spots, or repeating ridges. The U.S. Environmental Protection Agency’s moisture-control guidance recommends drying wet materials within 24 to 48 hours to limit mold growth, but older delamination may need deeper drying. A repaired panel can look perfect and still be weak underneath. Tap testing helps, although it is not conclusive. Compare the sound with an undamaged area. Recheck the panel after temperature and humidity change. I have seen rushed repairs pass a visual check, then reopen at the edge. If movement continues, remove the finish and investigate the substrate instead of adding another coat.
Finish, seal, and inspect the repaired plywood panel
These reference values summarize practical checkpoints for a plywood delamination repair: allow the panel and adhesive to dry fully, keep moisture within a typical indoor woodworking range, and inspect the bonded area for complete contact without visible gaps. Always follow the adhesive and finish manufacturer's instructions.
Find and fix the moisture source, such as a roof leak, plumbing drip, ground contact, or poor ventilation. Otherwise, the layers may separate again.
Use a moisture meter and wait for the reading to stabilize. Touch alone can mislead. Indoor wood commonly measures around 6–10% moisture at 30–50% relative humidity.
Work a thin putty knife beneath the loose layer slowly. Stop if sound wood resists. Forcing it can tear the veneer.
Cut away loose or crushed fibers, then brush or vacuum out dust and softened residue. Keep firmly attached wood in place.
Set it on spacers so air reaches both sides. Use gentle airflow and keep it flat. High heat can warp the outer veneer.
Use compatible structural adhesive, a spreader, wax paper, flat cauls, clamps, gloves, and a moisture meter. Test the adhesive on scrap first.
Spread moderate pressure across the repair with several small clamps and flat cauls. I once clamped too hard and squeezed out too much adhesive. It failed early.
Replace the panel if several layers are crushed, swollen, or widely separated. Musty odor, staining, soft edges, bubbles, or hollow tapping deserve careful assessment. I would not ignore those signs.
This guide explains How to repair delaminated plywood layers by first identifying the cause and assessing how far the separation extends. Moisture, impact, poor bonding, or long-term stress may affect the repair approach, so the panel should be inspected carefully before work begins. Prepare a clean, stable workspace and gather suitable adhesive, clamps, protective equipment, cleaning tools, and sanding supplies. Remove loose material, gently separate the damaged layers, clean away dust and debris, and allow the plywood to dry completely.
Next, apply an even layer of adhesive to the prepared surfaces and carefully realign the plywood layers. Use clamps or evenly distributed pressure to hold the panel securely while the adhesive cures according to its instructions. After curing, remove excess adhesive, sand rough areas, and check that the repaired section is firm and level. Finally, seal the plywood with an appropriate protective finish to reduce future moisture absorption, then inspect the panel for gaps, movement, or remaining weak spots before returning it to service.

Regit Decor